About a month after the battles of Lexington and Concord in April 1775, Patriot militia surrounded Boston, trapping British troops inside the city. In mid-June, Patriot leaders learned the British planned to seize the high ground near the town. On the night of June 16, about 1,000 soldiers from Massachusetts and Connecticut moved onto the Charlestown Peninsula to fortify Bunker Hill. By mistake, they built their main defenses on nearby Breed’s Hill, a lower slope but closer to Boston.
Overnight, the Patriots built a large fort and reinforced fences leading toward the Mystic River. They hoped the position would block a British advance, but they underestimated their own supply problems. Many soldiers carried limited ammunition and had little combat training.
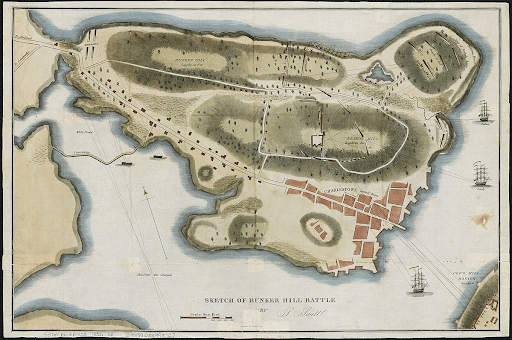
In the morning, British commanders were surprised to see the new position. They ordered General William Howe to lead about 2,400 troops across the Charles River to attack. The British believed they could easily scatter the Patriots, but they underestimated the strength of the defenses and the difficulty of the terrain. Low tide delayed their landing, and stone walls, split-rail fences, hedges, and marshy ground blocked the approach to Breed’s Hill. Naval cannon fire could not fully cover the advance.
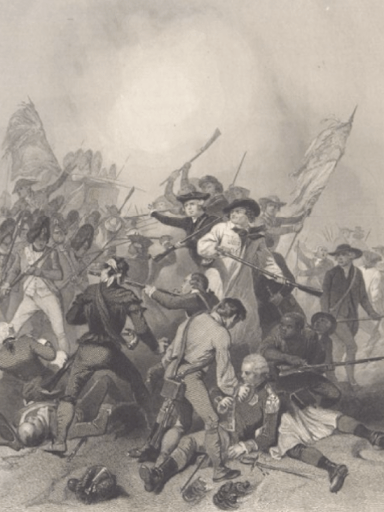
Late in the afternoon, British troops marched uphill in perfect formation. Twice, they were driven back by heavy musket fire. On the third attempt, the Patriots ran low on ammunition. British soldiers broke into the fort, and fierce hand-to-hand fighting followed before the Patriots retreated to nearby hills.
The British claimed victory, but it came at a high cost: more than 1,000 casualties compared to about 450 for the Patriots. The heavy losses ended British plans to seize other positions around Boston, and both armies settled into a long siege of the city.