Because Exploros is a collaborative environment, you need a good Internet connection for things to work properly. If you are using the HTML5 version of the app, open it with a Chrome or Safari browser.
If you are using Exploros with a new teacher, he or she may request that you connect your account to the class. Access the menu to the right of your profile image and choose “Join a class” Carefully enter the class code exactly as given to you in order to connect to your teacher’s class.

Access the Settings menu to the right of your profile image.
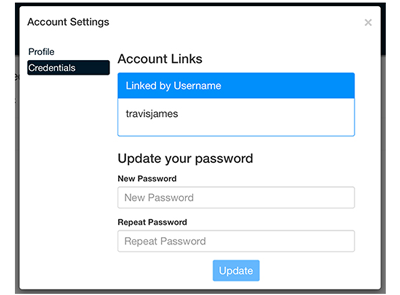
Account Settings has two tabs: Profile and Credentials.
Profile: Edit your name and profile image.
When you make posts in the Exploros app, it’s nice to put a face to a name! Follow these steps to add your picture:

Credentials: Review information about your user name and password. Change your password here if your Exploros account is not linked to a Google account.
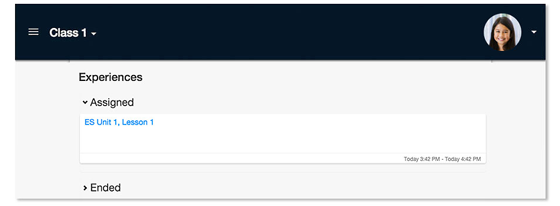
In Exploros, your teacher assigns you an experience. You will see it in your app, in either the Assigned or Scheduled list.
Assigned experiences are active during the dates and times indicated below the title. You can work through an assigned experience until its end date and time. After that point, the learning experience will move to the Ended list and you will not be able add or edit posts.
Scheduled experiences have not yet begun, and therefore you cannot access them. When a learning experience becomes active, it moves to the Assigned list, where you can open it to participate.
Ended experiences have reached their end date and time. The experiences become read-only, meaning you can no longer post, respond to classmates, or enter information in any way. To view an experience that has expired, click “Ended” to expand the list.
You can view the past experience in one of two ways. Click “View as” and choose:
When you click an active experience, the toolbar at the bottom of the Exploros app will display these icons:

The back arrow takes you to the home screen.
The dashboard icon takes you to the activity dashboard, which has two tabs:
The activity icon takes you to the learning experience, where you can navigate through content and interact with your teacher and classmates.
The pack icon leads to a screen that contains additional resources, such as website links, PDFs, and videos that give more background information on the subject matter. Depending on the experience, the pack may contain a lot of material or it may be empty. Some of the resource materials will only become available after you reach a particular scene.
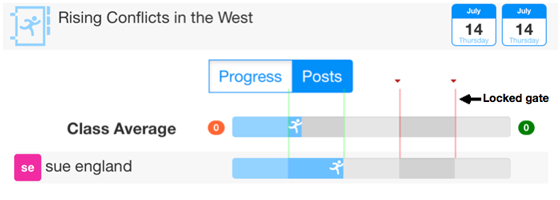
A learning experience is divided into scenes. The length of a scene depends on the amount of content and discussion or interaction in it. In most cases, you cannot move on to the next scene until you have posted to a certain number of input elements in the current scene. Many scenes also contain a gate that your teacher must unlock before you can progress to the next scene.
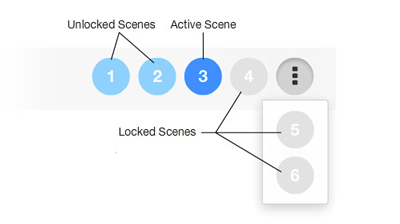

Some experiences are set up so that only the teacher can navigate the scenes. Each time the teacher moves to a new scene, it will be displayed on your device as well.
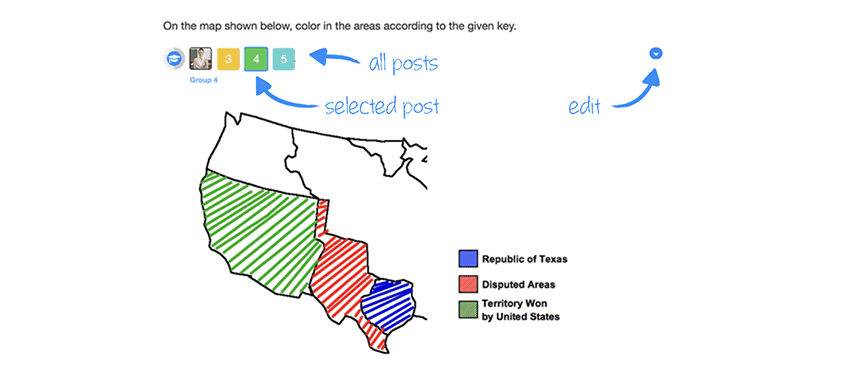
When you or your classmates post to an input element, Exploros identifies who submitted the post with a thumbnail containing a profile image (if uploaded), student initials, or the small group’s number.
For elements that “grow” with each post—the discussion wall and the table—the thumbnail displays to the left of each specific post. For all other elements, the thumbnails are placed along the top of the element. Click a thumbnail to view a classmate’s post or to access the edit menu of your own post.
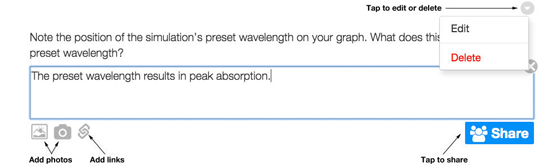
When you submit a post to an input element, you always have the option to edit or delete the post.
Click the thumbnail of your post that you want to edit or delete. From the drop-down menu, choose the desired action.
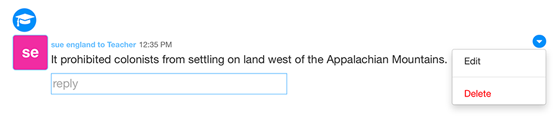
Note that a post submitted on behalf of a small group can be edited by any member of the small group.
Elements that require student input have different possible share settings:
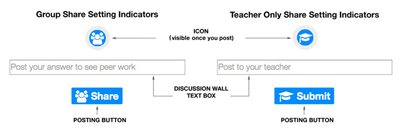
Exploros is collaborative, but participants may or may not be working through a scene at the same time. If you are the first to participate in a scene, you won’t see what your peers have posted to input elements. Therefore, you should check back at a later time to review and respond to posts you have not yet seen in the learning experience.
If you see an orange numbered square next to a discussion wall element, the number within the square indicates how many of the discussion wall’s posts you have not yet viewed. To see those posts, click the indicator and they will appear in the discussion pane with the students’ names briefly highlighted in orange. For some input elements, you must post an answer before you can view the posts other students have uploaded.

Exploros also contains quizzes and tests. To participate, click the element and then confirm that you are ready to start.
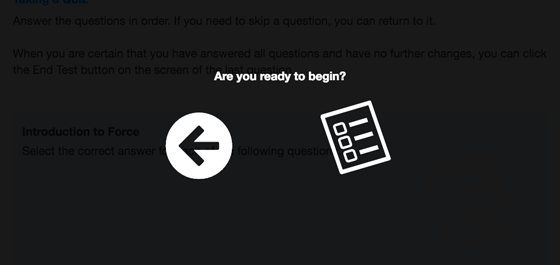
You can skip questions and come back to them later. If you leave the scene before you complete the test, upon re-entry the test automatically displays the item you were viewing. When you click the End Test button on the final item, your answers are submitted and you cannot reopen the test.
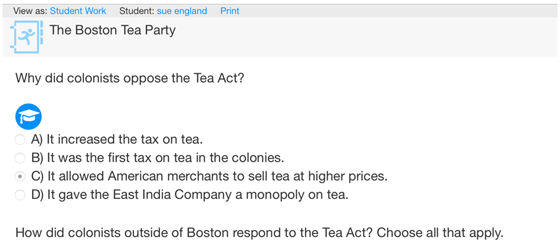
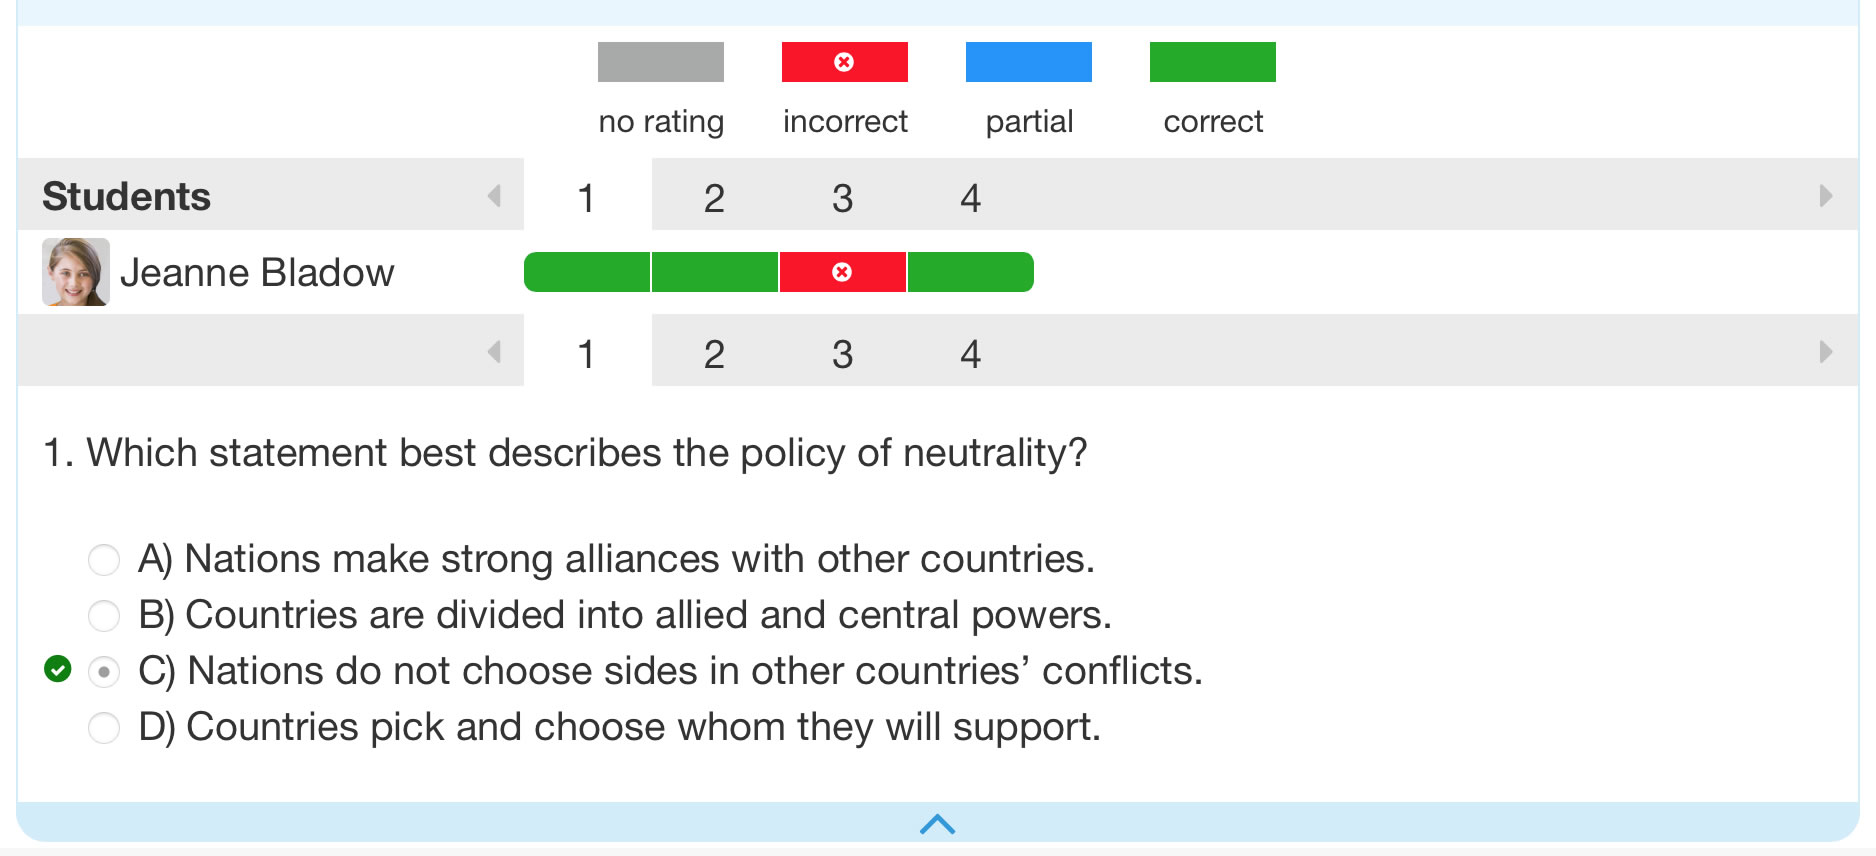
You can view your results once the learning experience expires. Expand the Ended list to locate the experience, which will likely be near the top since it recently expired. Open it and navigate to the scene that contains the assessment. When you click it, a heat map of your results displays.
Click an item number below the heat map to view the item, the correct answer, and your response.
An Exploros experience is made up of various elements. This section gives an overview of each input element and help for specific functionality. For general functionality, see the sections:
You can interact with your teacher and classmates via the discussion wall. You can post text, images, and links to the wall. If the wall is set to “Share with Group,” you can reply to your classmates.
You can edit and delete your own posts.
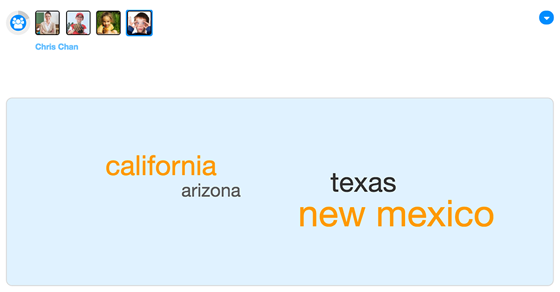
The word cloud displays student posts. A word or phrase that has been submitted by many students will be larger than the other posts.
For best results, you should limit your posts to a word or short phrase. To add more than one entry to a word cloud, separate entries with a comma, for example: George, Martha.
You can click a thumbnail to identify what words or phrases a specific classmate posted, or click a word in the cloud to see which classmates posted the word.
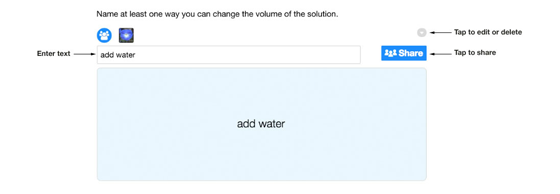
Enter text into the blank table row and submit. If the table has been pre-set for multiple posts per student, an empty row will be added at the bottom of the table.
To edit or delete a row after submission, click the thumbnail beside that row and then access the drop-down menu.

You can alphanumerically sort the display of data in a table by clicking the corresponding column header. You can click above the thumbnails to sort the display by poster (students or small groups).
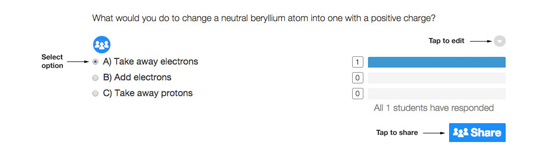
The choice element is a multiple choice element that is shared with your teacher only. The poll element is a multiple choice element that is shared with the entire group. You can see the answer distributions.
You can edit or delete your post in both elements.
The draw element provides a canvas with various tools, which are configured for the specific experience. The element may also display a pre-loaded background image that you are asked to annotate.
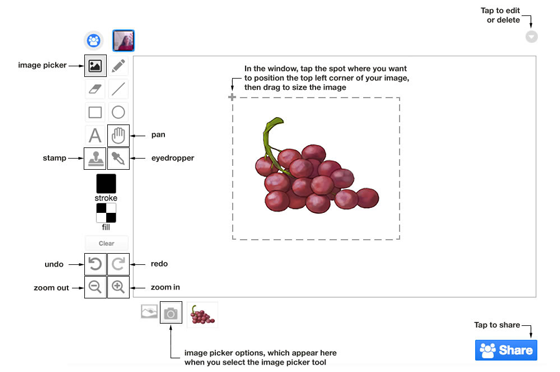
Use the image picker to upload a stored image to the canvas, or use the device camera to take an image for upload. Once you have uploaded the image, click where you want to position its top left corner and drag to size the image within the window. You need to deselect the tool before clicking the canvas to perform other operations.
If you have zoomed in the canvas, use the “Pan” tool to drag the image and bring a different section of it into view.
The draw element contains basic draw tools for adding lines and shapes and for setting colors:
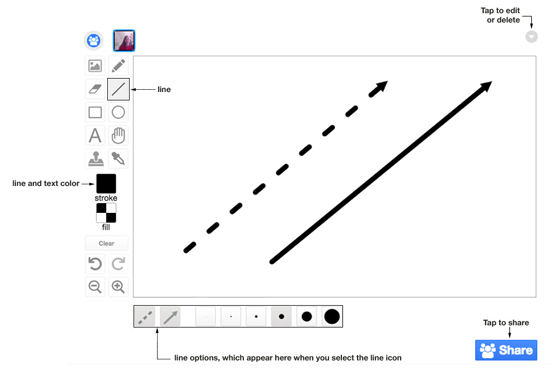
To change the color of text, a line, or the border of a shape, click “Stroke” and select a color before you enter the text or create the shape. To change the color within a shape, click “Fill” before you create the shape.
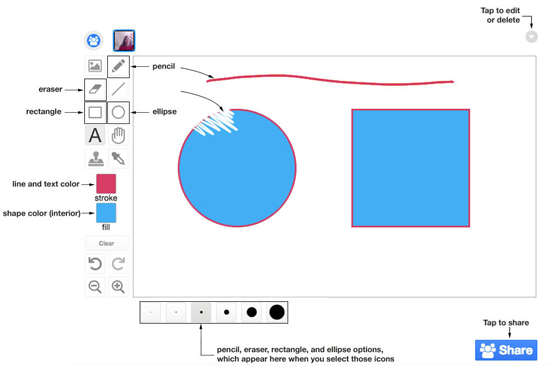
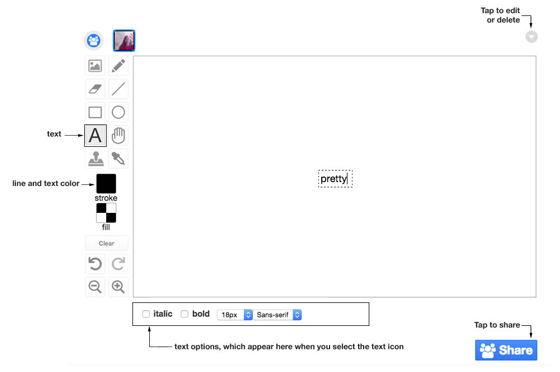
When using the text tool to annotate the drawing, you must click outside the text field to “enter” the text before navigating away; otherwise, the text will not be saved.
To undo the last thing you added to the window, click the undo icon; to restore it, click the redo icon. To clear the entire window and start over, click “Clear.” To edit or delete an image you already posted, click your thumbnail to access the menu at the upper right corner of the element.
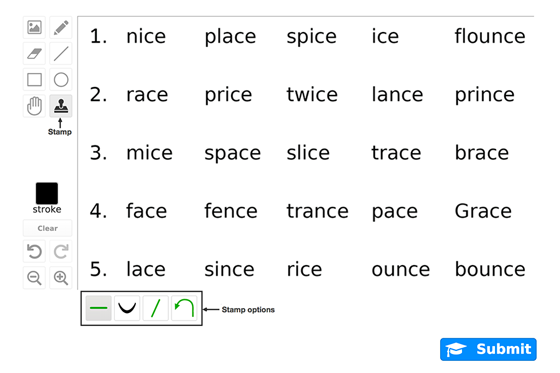
The draw element may be configured to include stamps. The actual stamps available are specific to the given experience. To use a stamp, click the “Stamp” icon and then choose the desired stamp below the canvas. Click anywhere on the canvas to place a stamp, or click and drag to stretch the stamp.
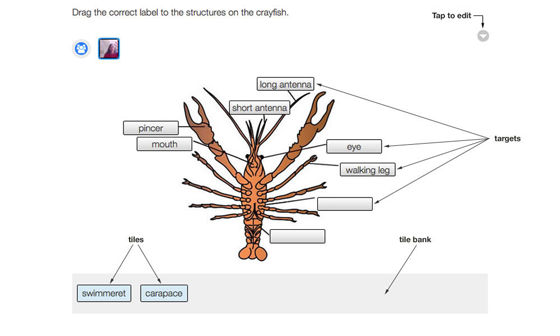
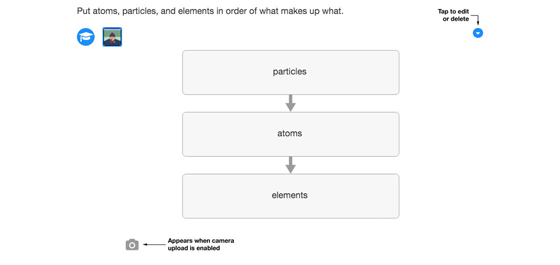
A drag-and-drop element presents you with a bank of tiles containing text, and a set of targets for placing the tiles. The targets may be within a text passage or placed on a background image.
Click a tile, drag it to the desired target, hover until you see a green plus sign, and then drop the tile onto the target. If you change your mind before submitting your work, you can drag a tile from one target to another.
The fill-in-the-blanks element presents you with text that includes blanks. Type short text answers into each blank.
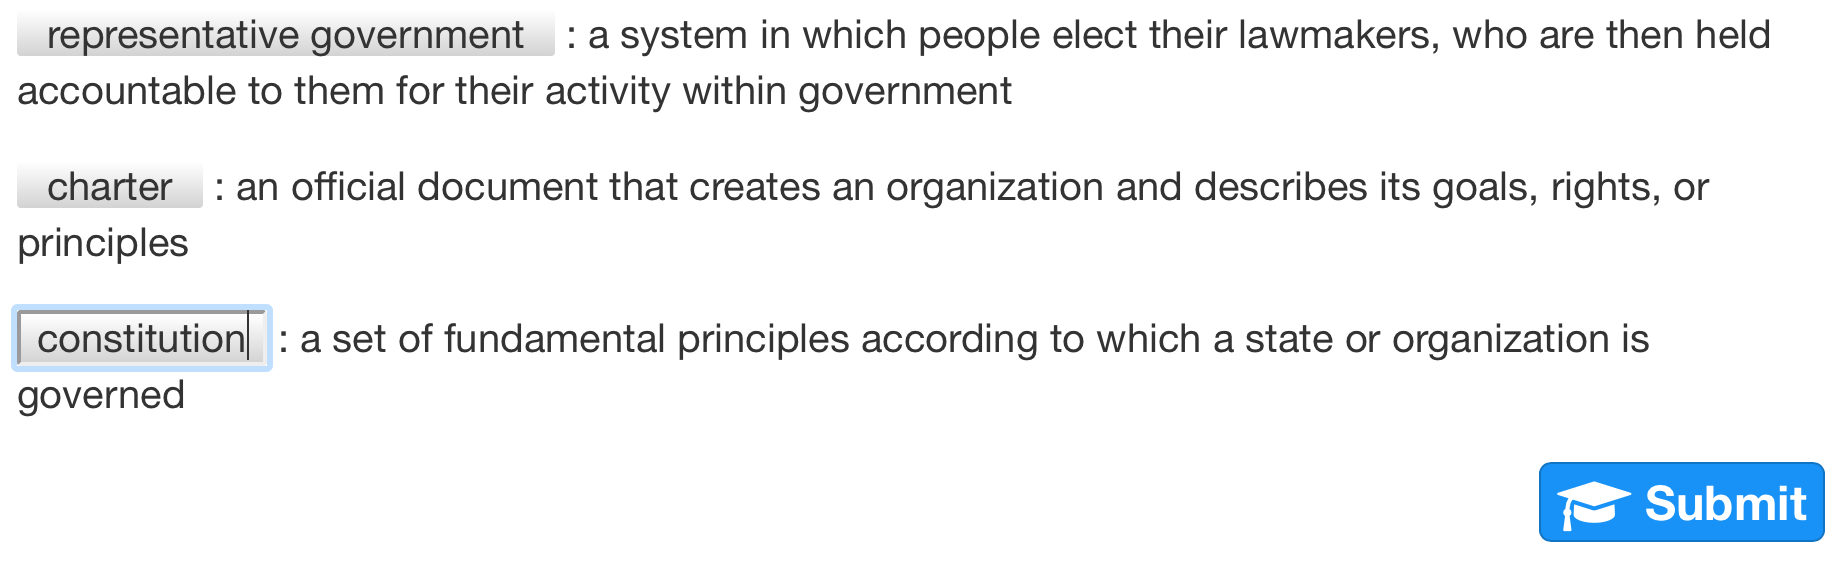
There may be optional hints that you can display by clicking the ? icon.

The assessment is NOT case sensitive; e.g., John Adams, john adams, and jOHN aDAMS may all be assessed as correct. You can delete or edit your posts.
There are a variety of graphic organizers, such as Venn diagrams and concept maps. You can post any amount of text to a graphic organizer’s input fields. If the text overfills the field, click “Read More” to display the full entry.
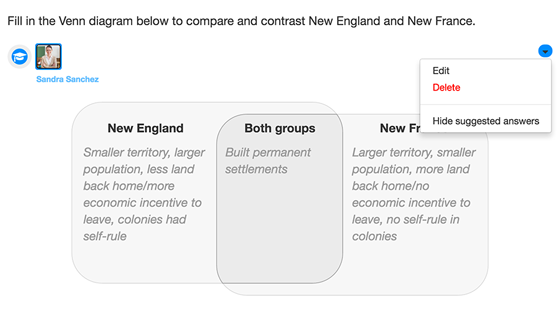
In some cases, you will also be able to upload a picture of a graphic organizer you filled out on paper; this option is indicated by a camera icon at the bottom left of the element.
Tap the link next to “Forgot your password?” on the app’s login screen, and you will receive a new temporary password via email. If you do not use an email account to log in to Exploros, ask your teacher to reset your password.
Access Account Settings in the menu to the right of your profile image. Then click Credentials. Note that if you log in with Google, you do not have a separate Exploros password. You cannot reset a Google password from within Exploros.
If you encounter problems moving on to the next scene:
First, check to ensure that you are connected to the Internet at or near full-signal strength. Then make sure you are using a Chrome or Safari browser. If you still experience issues, clear the browsing data and relaunch the app.
This message appears when the Exploros app has lost its connection to the Exploros server because you don’t have solid Internet access. Check that your device is connected to the Internet at or near full-signal strength.
You may also get this message when you reenter the app after not using it for a while. Usually, Exploros will find the server on its own, but if you continue to receive this message, refresh your browser tab. If this action does not fix the issue and you know your device is connected to the Internet at or near full-signal strength, quit the browser and reload the Exploros app.
When learning experiences reach their end date and time, they move to the Ended list. By default, the list is collapsed, so you need to expand it by clicking “Ended.” You can then locate and open up an expired experience and see your work, but you can no longer add posts or comments to that experience.